Fork and Prepare Trio Repository
Fork Trio
Important Decision: Personal Account or Organization?
Before you fork, decide whether to use a GitHub organization. This affects where you store your secrets.
Use a GitHub Organization if you:
- ✓ Plan to build multiple apps (Trio + LoopFollow)
- ✓ Want to enter secrets once for all apps
- ✓ Might try customized versions or development builds
Use Personal Account if you:
- Only building Trio (no other apps planned)
- Prefer simpler setup (fewer concepts to learn)
📖 Haven't decided? Review Create a Free GitHub Organization first, then come back here.
Changing Your Mind Later
You can switch to an organization later if needed, but it's easier to decide now.
Section Summary (click to open/close)
Fork https://github.com/nightscout/Trio into your account.
To skip the detailed instructions, click on Validate Secrets
Existing Fork
If you already have a fork of Trio, click on Already Have Trio to decide what to do. That section provides links to return you to these instructions.
Create the Fork
- Click this link https://github.com/nightscout/Trio to open the
Triorepository owned bynightscout -
At the upper right side of the screen, click on the word
Fork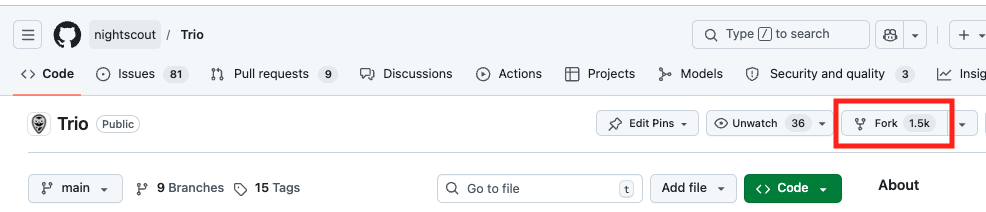
-
Refer to the GIF below - note this GIF is for LoopWorkspace - but the actions you take are the same for Trio:
- If you created a free organization (strongly recommended), you will see the display shown in the GIF below where you will choose your organization as the owner
- If you did not set up a free organization,
my-namewill be automatically filled in as the owner (Owner)
- If you did not set up a free organization,
- If you already have a fork, you should not proceed, see Already Have Trio
- The repository name is already filled in
- Do not rename the repository to something else
- It needs to match the original repository name or automatic building will not work
- Leave the selection that says "
Copy the main branch only" checked - Click on the green
Create forkbutton
- If you created a free organization (strongly recommended), you will see the display shown in the GIF below where you will choose your organization as the owner
Successful Fork
After creating the fork, your screen should be similar to the next graphic.
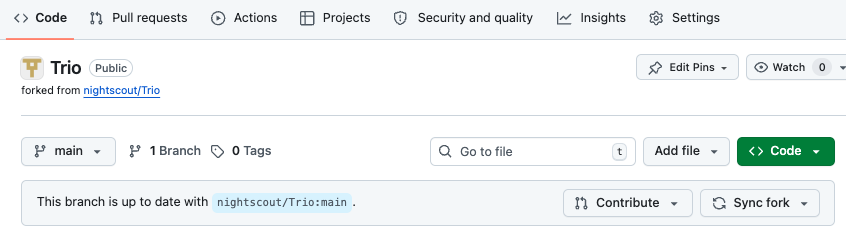
Carefully examine your screen paying attention to the bullets below.
- Note that your internet address (URL) is
https://github.com/my-name-org/Trioorhttps://github.com/my-name/Triowheremy-nameis the name you chose - The comment on the second row indicates where the fork came from (that is a clickable link)
- The branch that is selected is
main - The message says "
This branch is up to date with nightscout/Trio:main"
Configure Secrets
If you set up a GitHub organization (strongly recommended), follow this set of instructions.
If you decided to not to use a GitHub organization, skip ahead to Personal Account: Prepare to Enter Secrets.
What if I already have a bunch of forks in my personal account?
You do not have to switch to an organization. But if you want to make the move, follow instructions here Switch to a GitHub Organization
Prepare to Enter Secrets
You will be adding Secrets and Variables to your organization. This makes them available to any app you decide to build as long as you set up your free GitHub organization as the owner of the fork.
-
Tap on this GitHub link to see your organizations. (If you don't see a screen similar to the graphic below - you are not logged in to GitHub).
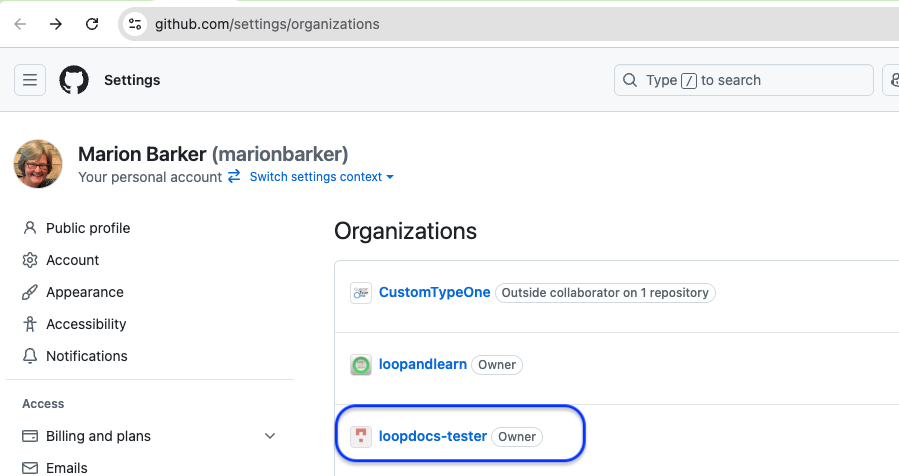
-
Choose your organization name from the list (most people will only see one organization)
- I chose
loopdocs-testeras my organization, so you will see that name in the URL for graphics in this section.
- I chose
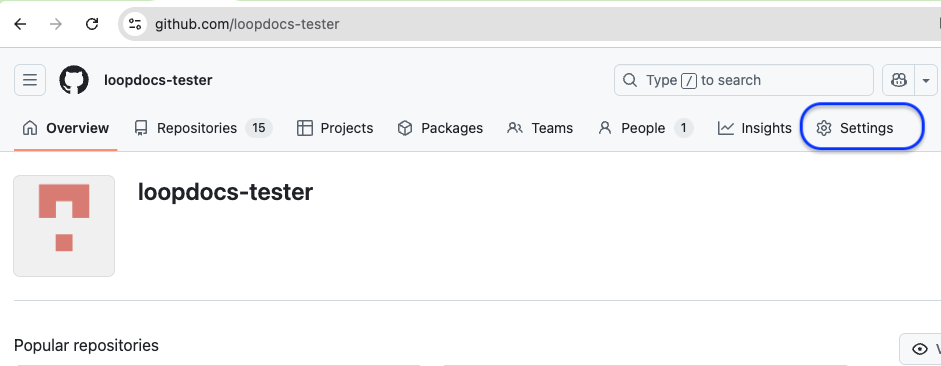
-
Click on the Settings Icon near the top right
- If you don't see ⚙️
Settings, make your browser wider or scroll to the right - After you click on ⚙️
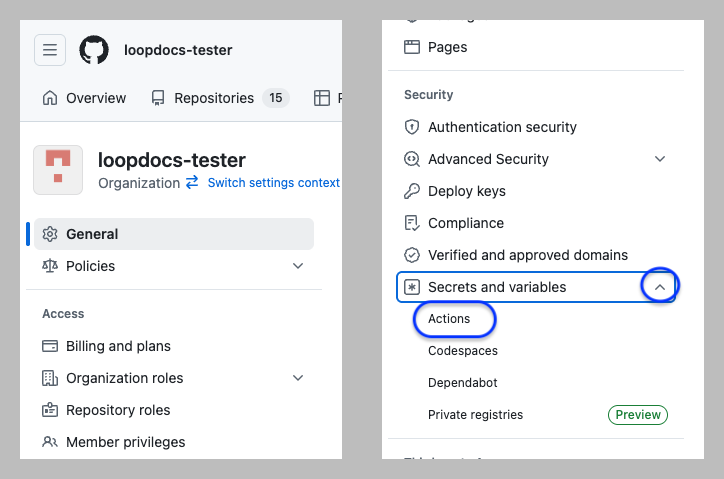
Settings, your screen will show a lot of menu items on the left side of the screen. - Scroll down until you can see the
Securitysection withSecrets and variablesdrop down. - Click on the dropdown icon and then select
Actions
- If you don't see ⚙️
The next steps are identical whether you are configuring your organizations Secrets and Variables or doing this for every repository in a personal account.
- Skip ahead to Enter the Secrets
Personal Account: Prepare to Enter Secrets
This section is only if you are using a personal GitHub account to build. Using an organization is recommended. If you are using an organization, skip ahead to Enter the Secrets.
Log into GitHub.
-
Return to your forked copy of
Trio- Click on your personal icon at the upper right to see the dropdown menu and select "
Your repositories"
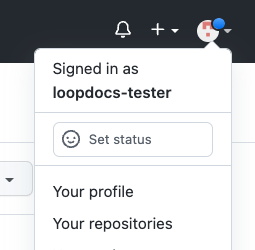
- Click on your personal icon at the upper right to see the dropdown menu and select "
-
Click on
Trioto open that repository-
You should see a bar of icons across the top with Settings on the far right

-
-
Click on the Settings Icon near the top right of your Trio
- If you don't see ⚙️
Settings, make your browser wider or scroll to the right - If you still don't see ⚙️
Settings, then you are not on your fork or you need to sign in to your GitHub account -
After you click on ⚙️
Settings, the left side of your screen should resemble the graphic below
- If you don't see ⚙️
-
Refer to the graphic above:
- On the left side, find the
Secrets and variablesdropdown (red circle) - Tap on
Actions(red rectangle)
- On the left side, find the
At this point the instructions are the same whether you are using an organization or a personal account.
Enter the Secrets
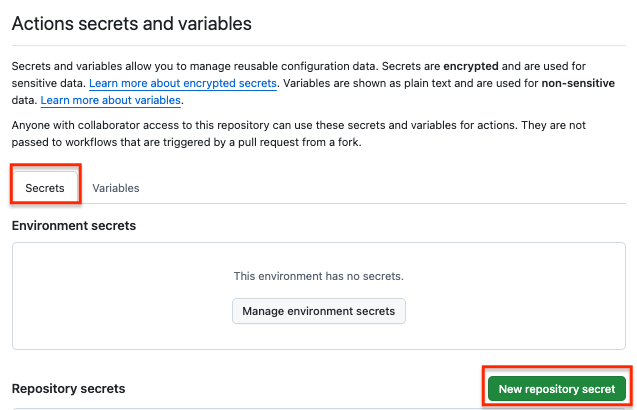
The steps to enter the Secrets and Variables are identical whether you are configuring these in your organization account or repeating this for every repository in a personal account. Your screen should look like one of the graphics below. If not head back to Configure Secrets.
If you are using a GitHub organization, tap on the green button for New organization secret:

If you are using a personal account, tap on the green button for New repository secret:
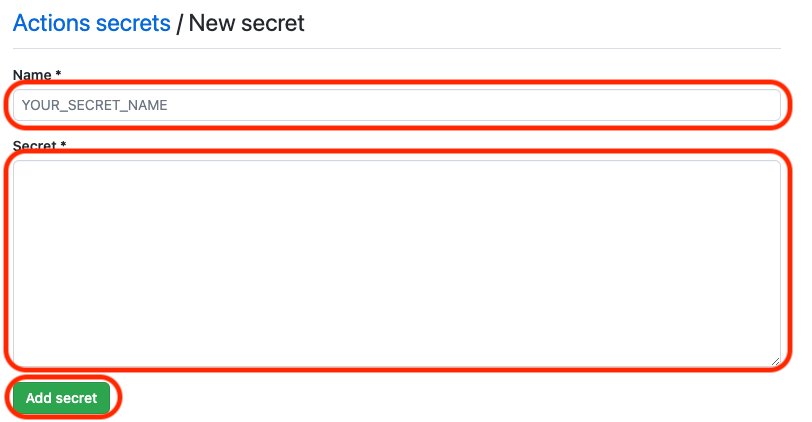
- After you tap on the
New secretbutton- A new screen appears as shown in the first graphic below
- Do not do anything until reading the sub-bullets, examining the graphics, and proceeding to the next section where each
Secretname is provided for you to copy and paste- Under
Name *, click onYOUR_SECRET_NAMEand paste one of the 6 secret names, as directed in Enter Each Secret - Click inside the
Secret *box and paste the value for that secret - Once you click on
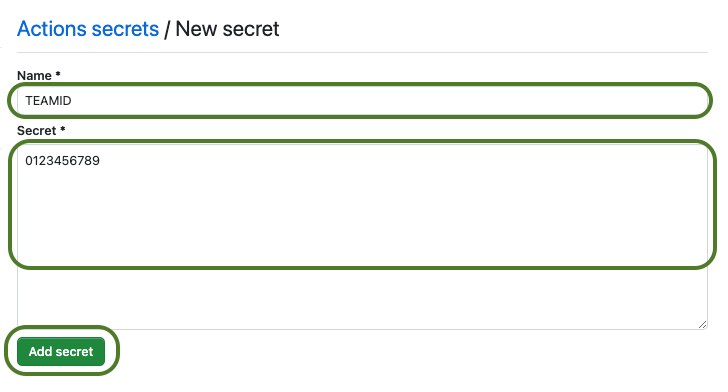
Add Secret, the secret will be added - The second graphic below shows
TEAMIDadded and ready for save
- Under
Enter Each Secret
Enter the name of each Secret found in Save Your Information and your value for that Secret.
- Once you save a secret value, you will not be able to view what you entered, so check carefully before you hit
Add Secret- You can replace the value for any secret later - but you can't view the saved value
- Be especially careful with your
TEAMID- If
TEAMIDis incorrect, the initialActionswill succeed butBuild Triowill fail and you will have some clean-up to do
- If
-
You can copy the names of the
Secretsby hovering to the right of each word below until you see the copy button (). Click on the button to copy theSecretname and paste it into GitHub where you seeYOUR_SECRET_NAME. This avoids spelling errors. -
For the
FASTLANE_KEYvalue, copy the entire contents from-----BEGIN PRIVATE KEY-----
through-----END PRIVATE KEY----- - For
MATCH_PASSWORDvalue - if you did not already make up a password and save it with your otherSecrets, do it now- The
MATCH_PASSWORDmust be the same for any repository using this method
- The
Once you add all six Secrets, your screen should look similar to the one of the two examples in the graphic below.
An organization account (top half of graphic) has a column for Visibility which is not seen in a personal account (bottom half of the graphic). The default setting for visibility is
Public repositories. If yours says anything else, you should update the visibility by tapping on the pencil icon.
- Check that all of your
Secretsare spelled correctly - If one is misspelled, delete it and add a
New secretwith the correct name

Add Variable
This variable (not a secret) provides automatic renewal of certificates, which expire once per year.
- While in the same screen where you enter the
Secrets, click on theVariablestab to the right of theSecretstab- If you aren't at the screen:
- GitHub organization account: go to your organization page and select Settings; scroll down, select
Secret and Variableand then selectActions - GitHub personal account: go to your repository for the app you are building, select Settings; scroll down, select
Secret and Variableand then selectActions
- GitHub organization account: go to your organization page and select Settings; scroll down, select
- If you aren't at the screen:
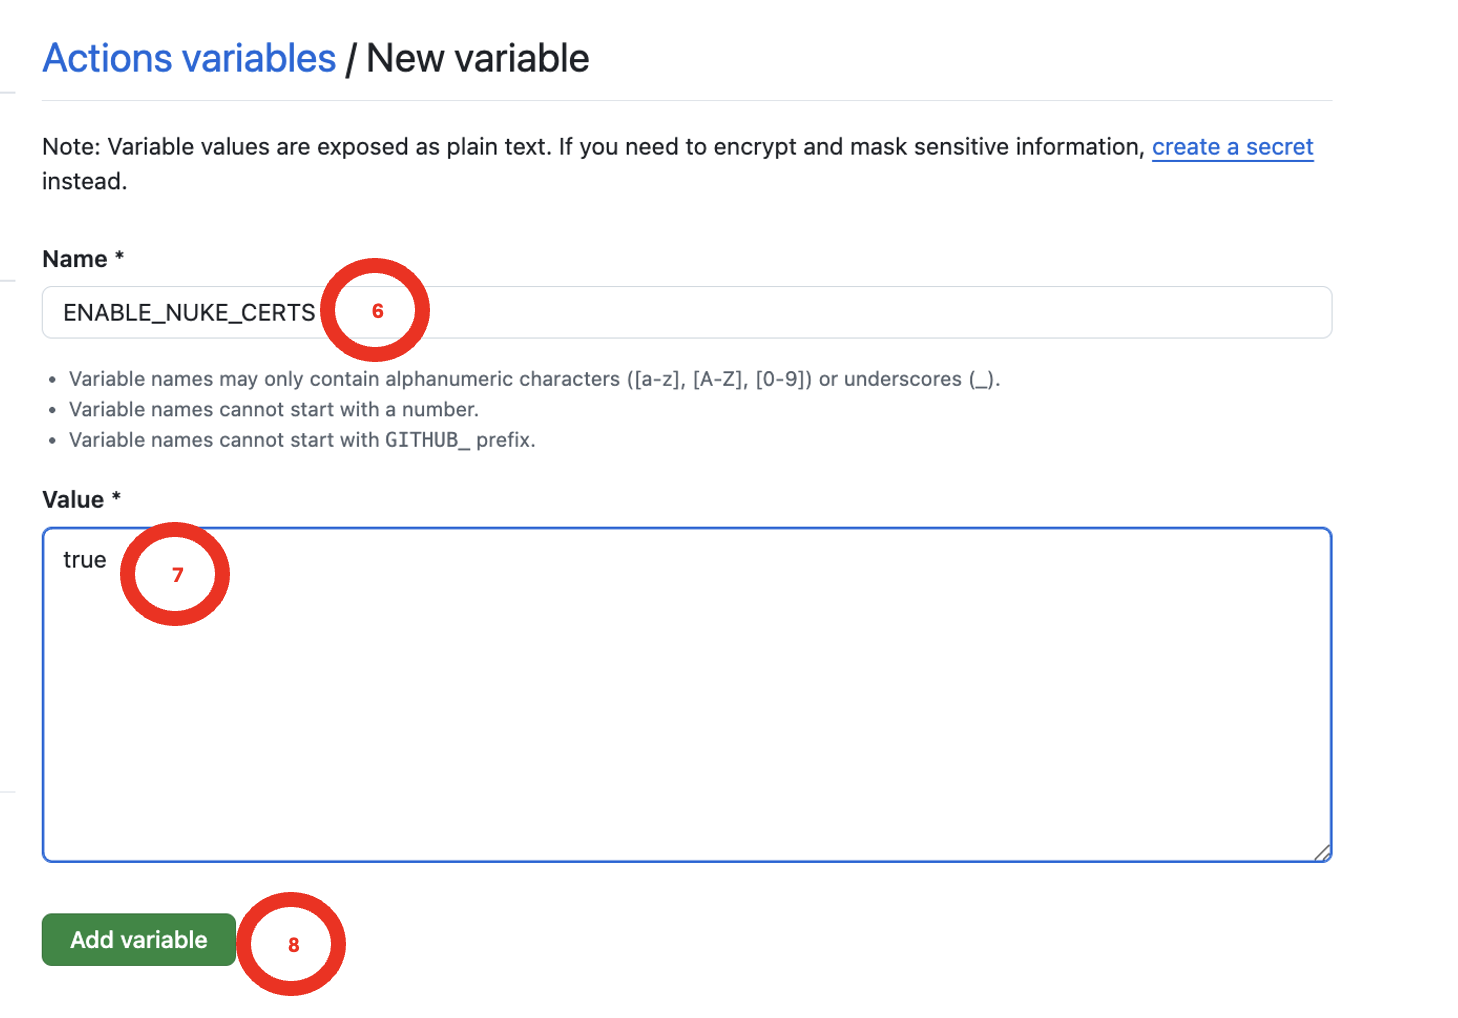
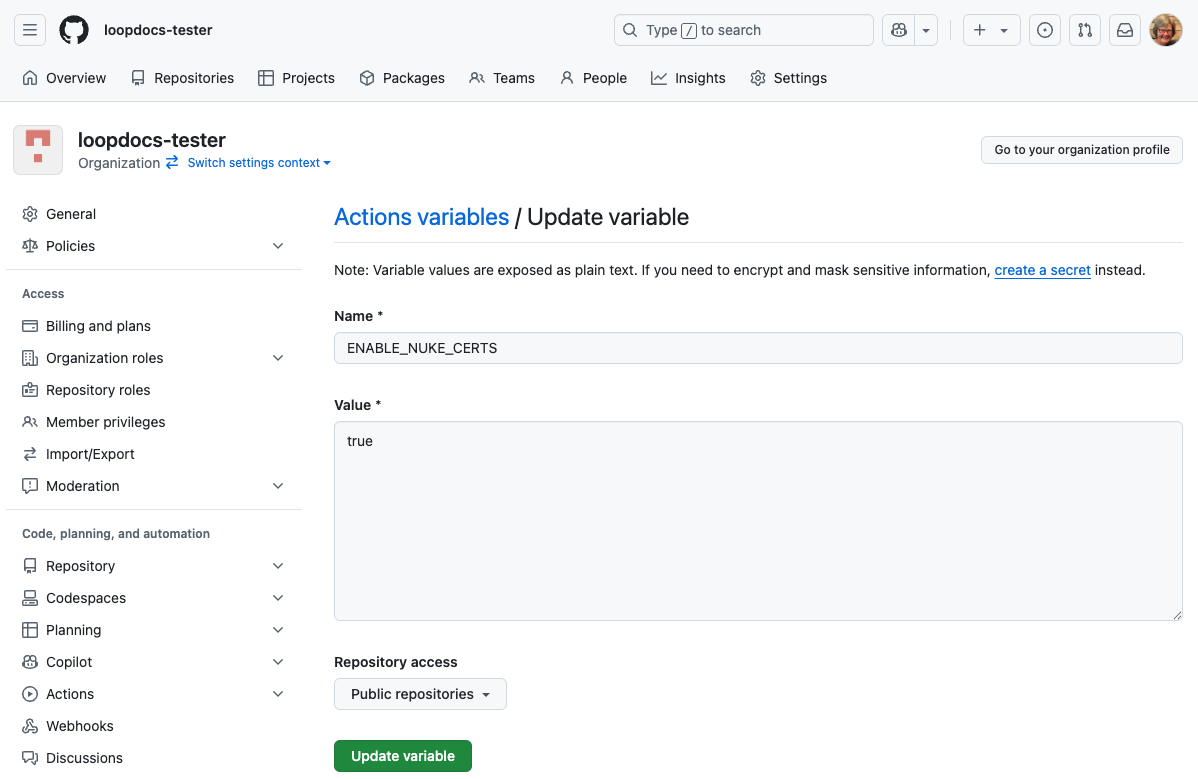
- Select new variable and give it the name the
ENABLE_NUKE_CERTSand entertrueas the value
What will this accomplish?
- Certificates will be automatically updated if you have configured this
Variable - As long as your Apple developers license is valid and all agreements are signed: you can skip the steps to create or renew your certificates!
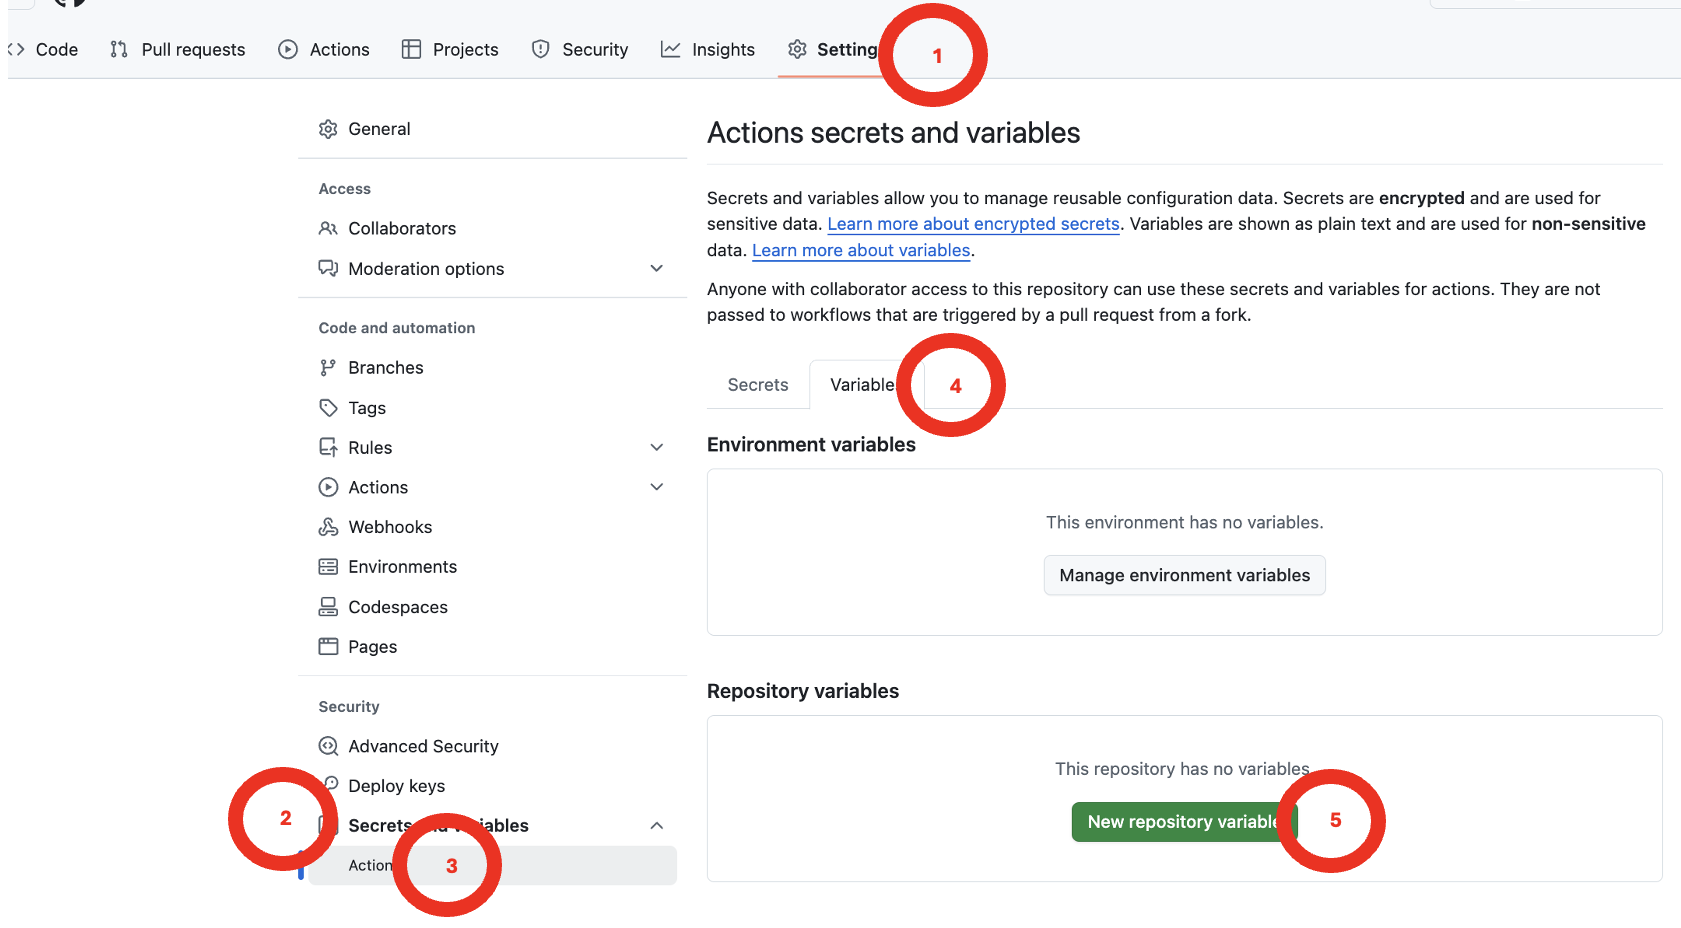
Not sure how to get to the Variables screen? Review the two graphics.
This graphic shows how to access Variables for a repository (similar steps required for an organization).
This next graphic shows filling out the variable for a repository that is not part of an organization.
This final graphic shows how to add the ENABLE_NUKE_CERTS to an organization. Be sure that Repository access is set to Public repositories. When adding this to a repository, that option is not shown.
Next Step
Secrets are configured! Now let's validate them:
Navigation: ← Back: Collect Apple Secrets | Next: Validate Secrets →
Switch to a GitHub Organization
If you are someone who already has a lot of forks in your personal account and want to switch to using a GitHub organization. Here's how:
- Follow the steps to create your organization
- Add the
Secretsand theVariableto your GitHub organization as explained in Prepare to EnterSecrets - Fork all the repos you normally use, but this time, set your organization as the owner
- For each repository in your organization:
- Tap on the Actions tab
- Enable Actions
- Run the Create Certificates Action and wait for success
- Run the Build Action
- WHAT??
- That's right - all the setup is done on the Apple side and you already did that
- If you successfully built with your private GitHub account, everything is already configured
- The one thing you might want to do is copy customizations from your personal account fork to the organization fork
- Return to your private GitHub account
- Your choice: either delete the forks in your personal account or at least disable the building from your personal account
Important
Your personal GitHub account is still needed. The free organization points to your personal account as a member. If you delete your personal GitHub account, you lose access to your organization account too.
Already Have Trio?
Some people may already have a copy (fork) of Trio.
If your copy (fork) is not from nightscout, follow the Delete and Start Fresh directions.
If your copy (fork) is from nightscout:
- Open your
Triorepository (https://github.com/my-name-org/Trio) where you use your version ofmy-namein the URL - Review the graphic in the Configure: Successful Fork section
- Make sure all the items highlighted by red rectangles are correct with the possible exception of your fork being up to date
- If you see a message that your fork is not up to date - tap on the
Sync forkbutton and follow the instructions - Continue with Validate Secrets
Delete and Start Fresh
If your fork is not from nightscout:
- Delete your Trio repository
- Instructions to delete a repository are found at GitHub Docs
- Return to Fork Trio and follow all the instructions